Thrift Store Frame Flip | Budget-Friendly DIY Home Decor
As an Amazon Associate and member of other affiliate programs, I earn from qualifying purchases.
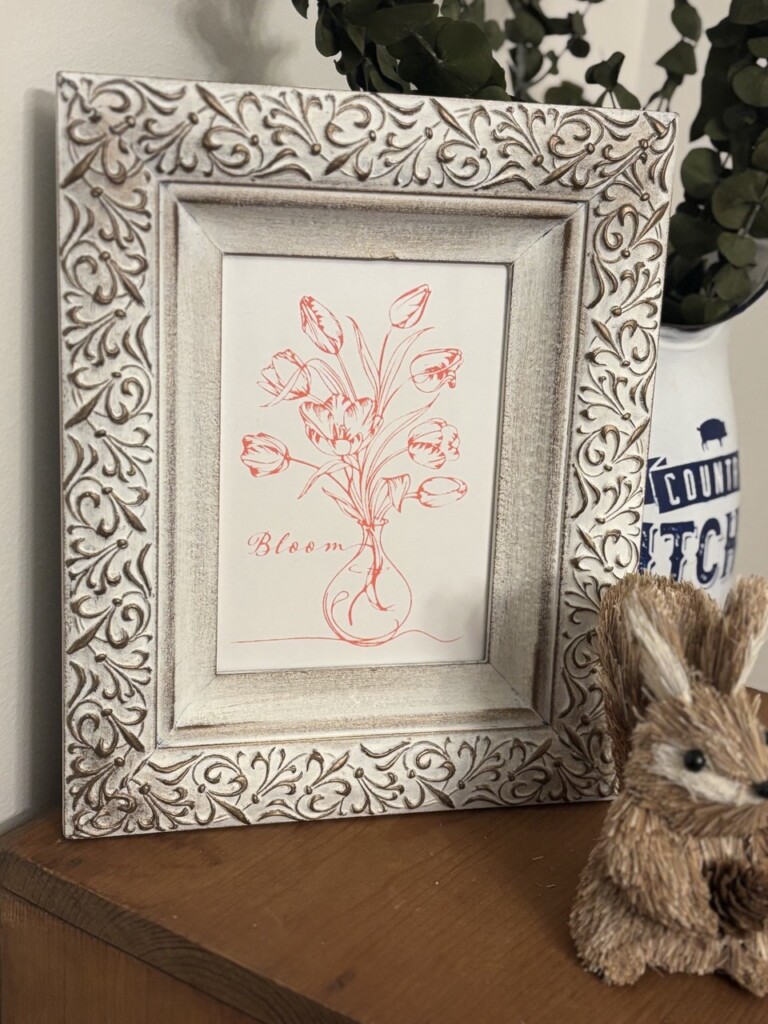
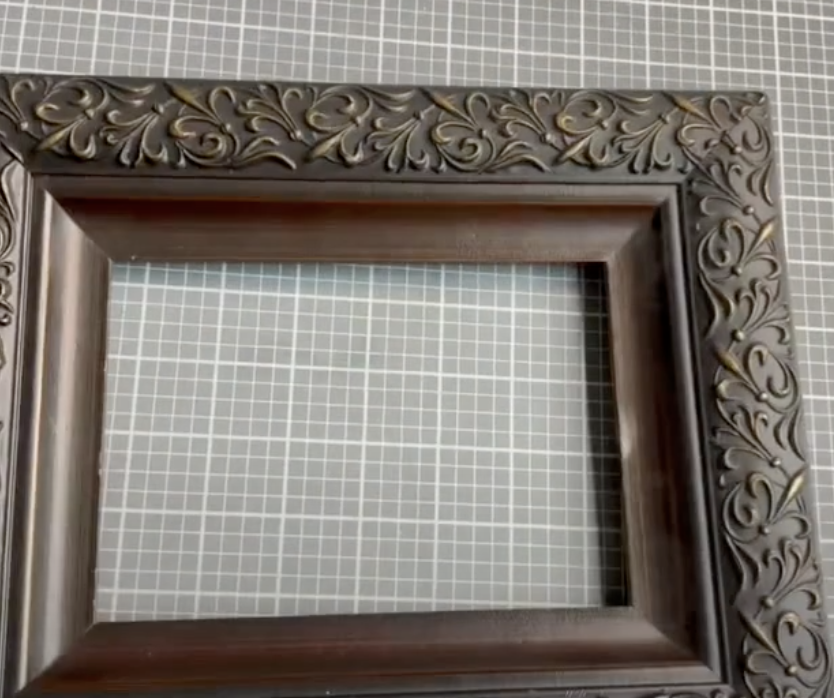
Hey friends! I’m so excited to share this fun thrift store frame flip — an easy budget-friendly project that gave new life to a $3 thrifted frame! In this tutorial, I’ll show you how to flip a thrift store frame just by using antique white chalk paint, bronze gilding wax, and a beautiful floral chalk transfer.
This DIY Thrift Store Frame Flip is a simple project that turns an outdated frame into a stunning piece of handmade vintage home decor.
This is such a fun project for beginners or seasoned crafters — plus it’s budget-friendly and fully customizable for your style!
Why Flip a Thrift Store Frame?
Flipping thrift store frames is a simple and fun way to create custom decor. Here’s why you should try this DIY Thrift Store Frame Flip:
- Save money on expensive home decor
- Upcycle old or unwanted items into beautiful new pieces
- Personalize your space with handmade designs
- Add charm and character to any room in your home
Materials for Your DIY Thrift Store Frame Flip:
– Thrift Store Frame (any size or style you love)
– Chalk Paint (I use Waverly in the color Ivory) or Acrylic Paint (Folk Art in Vintage White is my go-to)
– Dixie Belle Bronze Gilding Wax
– Chalk Transfer – *Blooming Tulips Transfer* (or any design you love)
– Chalk Paste in *Couture Coral*
– Chalk Squeegee
– Sandpaper (optional for distressing)
– Painter’s Tape (optional for clean edges)
– Clear Sealer (optional for protection)
How I Made This Thrift Store Frame Flip
Step 1: Clean and Prep Your Thrift Store Frame
Start by wiping down your frame to remove any dust or dirt. (My go-to is Krud Cutter) If your frame has a slick surface, give it a light sanding so the paint will adhere better.
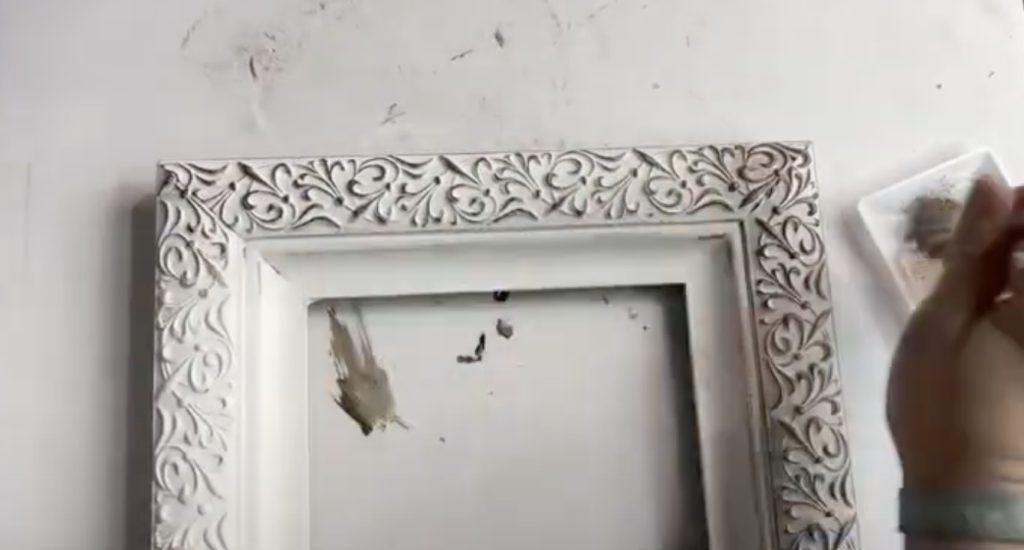
Step 2: Paint Your Frame with Vintage White Paint
Apply one to two coats of antique white chalk paint to the entire frame. Let each coat dry fully before applying the next. Chalk paint is perfect for giving thrift store frames a soft, matte finish and a vintage look.
Allow to dry completely between coats.
Step 3: Add Bronze Gilding Wax for Vintage Highlights
Using your finger or a fluffy brush, lightly dry brush the raised areas and details of the frame with bronze gilding wax. This will highlight all the beautiful textures and give the frame that antique, high-end look.
*Pro Tip:* Less is more — start light and build it up slowly.
Step 4: Apply a Chalk Transfer
Remove your *Blooming Tulips Transfer* from the backer sheet and fuzz it very well with a fuzzing cloth or your tee shirt. You just want to have a bit of fuzz on it so that it isn’t super sticky. Lay it down on the back insert of your frame (or cut a piece of wood/cardstock to fit) where you would like your image.
*Pro tip*: If you are chalking on cardboard or cardstock, make sure you grab Surface Wax and give it a thin coat to avoid your transfer from sticking. Remember, make sure to buff it until it is slick, smooth, and not tacky. “We don’t like tacky around here, y’all”
Place the transfer where you’d like the floral design to be, smooth it down, and use a squeegee to apply the paste over the design.
Carefully peel back the transfer to reveal your gorgeous image!
Let it dry completely or use your Quick Dry Tool.
Step 5: Assemble Your Frame
Once everything is dry, place your chalk art piece back into the frame.
Optional: Seal your frame and chalk art for extra durability — especially if you’ll be displaying it in a high-traffic area.
Final Tips for Styling Your Thrifted Frame
Create a set of matching frames for a gallery wall
Display your frame on a mantel, shelf, or entryway table
Pair it with candles, greenery, or other vintage pieces
Add a quote or word transfer for extra personalization

Why I Love This Project:
This DIY thrift store frame flip is a perfect example of how creativity can breathe life into old pieces. The combination of soft vintage white, bronze accents, and the vibrant floral chalk art creates such a beautiful, timeless piece you’ll be proud to display.
And the best part? No two frames will ever turn out the same — each one tells its own story.
Ready to Make Your Own?
Check out more DIY projects and home decor inspiration at SimplyBlessedDesignz! Don’t forget to tag me on social media @SimplyBlessedDesignz to show off your DIY Thrift Store Frame Flip!
Tag me on social media @SimplyBlessedDesignz so I can see your frame flips — I love seeing how everyone puts their own twist on projects like this!
About the Host

Hey sweet friend — I’m Ashley, the heart behind SimplyBlessedDesignz and the voice of Unscripted Conversations.
I’m a faith-filled creative who believes in Jesus, Dollar Tree flips, and showing up even when life gets messy. Whether I’m podcasting, crafting, or cooking something from scratch, my prayer is always the same: that you leave here encouraged and reminded you’re never alone.
Grab your coffee, pull up a chair, and let’s do this life—one grace-filled day at a time. 💛